Tuesday, February 10, 2015

Quick fix: issues build osghaptics against OpenSceneGraph 3.1 and later

SensorManipulator.h and SensorLinkCallback.h
//Ruiying #include

#include


HapticRenderBin.cpp
//Ruiyin osgUtil::RegisterRenderBinProxy s_registerRenderBinProxy("HapticRenderBin",new HapticRenderBin(osgUtil::RenderBin::getDefaultRenderBinSortMode()));


HapticRootNode.cpp

Wednesday, May 15, 2013

Compiling 64 bit Qt5 using Visual Studio 2012 (Windows SDK 8.0)

Added Qt Creator 64 bit built


1, extract Qt to c:\opt\qt-5.0.2
2, download ICU and extract it under c:\opt\ICU
3, install Python 2.7.4 x86_64 (C:\Python27)
4, install ActivePerl 5.16.3 x64 (C:\opt\Perl64)
5, build 64 bit ICU, open the allinone.sln under c:\opt\ICU\source\allinone by Visual Studio 2012 and pick solution platform as x64 and build solution.
6, open VS2012 x64 Native Tools Command Prompt
7, set environment variables:
set QTDIR=C:\opt\qt-5.0.2\qtbase
set QMAKESPEC=win32-msvc2012

set PATH=%PATH%;C:\opt\perl64\bin;c:\opt\Perl64\site\bin;c:\opt\ICU\bin64;c:\Python27;c:\Python\DLLs

set INCLUDE=%INCLUDE%;C:\opt\ICU\include
set LIB=%LIB%C:\opt\ICU\lib64

8, config Qt for compiling
cd c:\opt\qt-5.0.2
configure -prefix %CD%\qtbase -release -opensource -icu -platform win32-msvc2012
9, download jom and extract it to c:\opt\qt-5.0.2\jom
10, fire the command to build Qt
c:\opt\qt-5.02.\jom\jom.exe -jN (N is the number of parallel processes)

Build Qt Creator

1,download Qt Creator and extract it to c:\opt\qt-5.0.2\qt-creator-2.6.2
2, cd c:\opt\qt-5.0.2\qt-creator-2.6.2
qmake -r
..\jom\jom.exe -jN

referenced  Vincenzo Mercuri 's post

Setting Perforce for UDK

1, Download and install Perforce Versioning Engine P4D (use default options)
2, Download and install Perforce Client P4V (use default options)
3, Download and isntall UDK Download UDK (C:\UKD\UDK-2013-02)
5, Start P4V and create a workspace for UDK, use what ever name you like, but make sure Workspace root point to where UDK installed, for my installation it is C:\UKD\UDK-2013-02.


6, Start UDK Editor

Friday, March 19, 2010

Edit Stereoscopic Video

Will not talk about how to get your footage...use two cameras, no matter real cameras or cameras in any 3d software...so, if you have image sequence please start from step 1, or else you have AVI files as footage, go straight to step 2. I'd suggest using AviSynth and VirtualDub to do the job. Both AviSynth and VirtualDub are free!

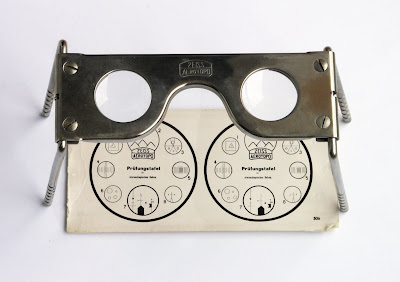
Note:image borrowed from Wiki

  1. Image sequence-->AVI

  2. create a file name it as "left.avs", suppose you have 100 tga files, from 0001.tga through 0100.tga, put the following line to "left.avs"

    ImageSource("%04d.tga", 1, 100, 25)

    at this point, you can use Windows Media Player to play this "left.avs" already! But we can get our AVI file via VirtualDub. From VirtualDub open "left.avs" and save it as "left.avi". Just as easy as that! Repeat the same steps, you will get right eye video ready, say you have "right.avi" up to now.

  3. Stack two AVIs Horizontally

  4. Create a new file and name it as "stereoscopic.avs" first, put the following line to it

    StackHorizontal(DirectShowSource("yourlocation\left.avi"),
    DirectShowSource("yourlocation\right.avi")


  5. Generate stereoscopic AVI

  6. Open "stereoscopic.avs" from VirtualDub, and save it as "stereoscopic.avi"...done!


...and DONE.

Wednesday, October 14, 2009

OpenGL 3.2 and More

Check out this SlideShare Presentation:

Monday, September 21, 2009

Proposal for PROPOSAL

01, Cross-Modality
Sept 21


While I was reading an article on Codex from MOD about research on hyperthermia and hypothermia at QinetiQ, this idea popped up: how about we provide opposite visual signal, giving subjects opposite suggestion about what they are experiencing? With synthetic environment, we can easily generate illusive scene implying that the temperature is not as high as experienced. How much visual suggestion can alter body's feeling of temperature? Not sure. But cross-modal projections do exist.

To this point, I'm thinking more about cross-modal interaction. The facilities in VR lab equipped us for researching on cross-modal interaction. For example, visual/audio interaction (we'll need some audio devices), visual/haptics interaction and also I'm thinking of motion perception on treadmill that involves multisensory procedures as well. With the help of VR Technologies, all of these research can be much more convenient than using traditional methods only.

Back to the thought about hyperthermia and hypothermia, if my assumption serves well, we can handily make synthetic environment deploy-able (to field) by implementing it on mobile computing device. Mobile computing device not only makes Virtual Environment deploy-able to field, actually, any lab (I'm thinking of climatic chambers at QinetiQ, indeed, I mean any lab) without large-scale VR Facilities, can adopt mobile VR now. It does not cost a fortune.


Friday, December 12, 2008

Embedded mplayer


Still, I don't know whether this is useful, but you can try it for fun--I mean it was fun for me. Here it comes:

The sample I post here was created by c# as a WindowsForm, but as I aware there's nothing wrong if you prefer c++.

I'm not sure whether I should rumble about how to create a winform project from Visual Studio, just skip it for now.

Create a winform project, leave everything as default. As showing from the top picture, you drag a button to the form for "stop" and draw another button for "start". I really don't care where you put your buttons or how many you prefer, what they should look like, etc..

Note: at the postion of video window, I put a lable there as pre-opened window, we'll use that window to play media.

Now we come to the job itself, I mean embed mplayer to a window.

Open the Form1.Designer.cs, add a private member:
private System.Diagnostics.Process mplayerP;

Double click the "start" button, it will lead you to the click function:
private void button1_Click(object sender, EventArgs e)
{
int hWnd = mplayerwin.Handle.ToInt32();
string margs = string.Format( @"-wid {0} -vo gl2_stereo yourmedia.wmv", hWnd );
mplayerP = System.Diagnostics.Process.Start("mplayer.exe", margs);
}


Double click the "stop" button:
private void button2_Click(object sender, EventArgs e)
{
mplayerP.Kill();
}


DONE! have fun.

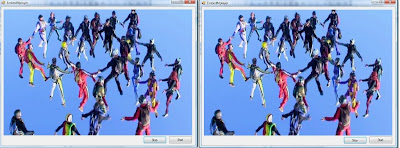
Note: the picture on top was playing video from 3dtv.at, a stereoscopic demo clip.

Friday, September 07, 2007

Three Steps Build a Haptic Model

I suggest you start from simple model, mine is a big H. You can do a sphere, cube as your first try. To keep the model as simple as you can will give you a clear field levels in X3D file. It will be helpful to understand where the haptic field goes from the beginning.

Step 1: Build a normal 3D model

You can use any 3D modeling application you're familiar with. I do not have 3D Max on my computer, so I created my model with blender. It's free and fabulous. Oh, don't forget assign material for your model, a default material will do.

Step 2: Export the model as X3D file

This is too easy to blog anyting on it, just export the file you created.

Step 3: Edit X3D file

Here comes something new. Open the X3D file you just exported with a text editor. Find the field <Appearance> and just after <Appearance> we add a new field <SmoothSurface/>. OK that's all, now you can use H3DLoad to check your model with default SmoothSurface.
Currently, without any programming work we have three haptic surface nodes to choose from. They are:
  • SmoothSurfce - a surface without friction
  • FrictionalSurface - a surface with friction
  • MagneticSurface - makes the shape magnetic
Note: H3DLoad comes with h3dapi package, you can download it from here
Pre requirement: a haptic stylus of course

PS: some H3DLoad options:
  • -f for fullscreen
  • -m for mirror
  • -s for with spacemouse


Labels: